
Building a Custom Fire Pit
Cozying up around a fire with friends and loved ones is one of the best feelings. As the cold and rainy winter months fade away, homeowners everywhere start itching to get outside, making spring the perfect time to start on outdoor projects. Fire pits are a great DIY project to kick off the spring season as they are relatively easy to build. For a custom fire pit that you and your loved ones can enjoy for years to come, visit your local building supply store for materials and follow the guide below:
Research and Choose a Location For Your Fire Pit
Before you go out and buy supplies, you should do a little research and planning. Some cities, towns, and neighborhoods have regulations and codes for building fires on your property. According to the City of Portland’s outdoor burning guidelines, recreational fires must be less than 3 feet in diameter, 2 feet in height, and at least 25 feet away from any structures. However, your local town or neighborhood could have different regulations, so it’s always best to double-check first.
In addition to ensuring your fire pit is far enough away from any physical structures, you should also check that there aren’t any low-hanging branches from trees or plants nearby. It’s okay for plants and trees to be close by; you just don’t want them so close that they could catch fire from the flames.
Materials and Tools You Will Need to Build a Fire Pit
- Shovel
- Mallet
- Hand Tamper
- Level
- Tape Measure
- Marking Spray Paint
- Construction Adhesive/Mortar: Construction adhesive is sufficient if the stones you choose can neatly stack on one another. However, if you choose more uneven, natural stone, you will likely want to use a mortar mix to build the structure.
- Gravel/Sand/Fire Pit Bowl: You will need to decide if you want to use a fire pit bowl or ring in your design or simply fill the pit with gravel and/or sand. Either way, you will still need some gravel to create the base. *A ring or bowl is recommended to protect the stones used for the main structure.
- Stones/Bricks/Tiles: If you are not using a ring or bowl, you will need to be sure your structure is made of fire-proof materials. If you are utilizing a ring or bowl, your materials should still be heat-resistant, but you will have a little more flexibility and variety to choose from.
Four Steps to Building Your Very Own Fire Pit
Once you have found your spot and planned out what size you want your fire pit to be, you can buy your materials and start prepping the site.
Step 1: Prepare the Pit Location
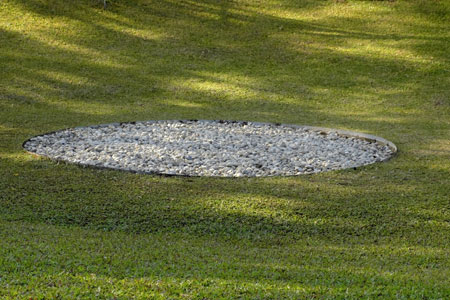
To create the base of your fire pit structure, you will need to dig a hole. Lay down a ring of test blocks directly onto the grass to form what will eventually be the first layer of your fire pit. Next, using your shovel, mark a circle in the grass about one inch outside the perimeter of the ring. You can also do this without the stones by simply marking a circle in the grass with the marking spray paint. Just be sure your circle is even and the correct size to make a ring with the stones you have chosen. After the circle is marked, dig a hole the size of the circle that is about 7 to 10 inches deep.
Step 2: Build the Foundation
After the hole is dug, fill it with drainage gravel. This step is essential as it will create a stable, level foundation for the pit to sit upon while also providing drainage and protecting against frost heaves in winter. Once the hole is filled, use the tamper to compact the gravel and create a level surface. Add or remove gravel where needed, and use the level to ensure that you have an even surface before moving on.
Step 3: Assemble the Walls
Lay down the first layer of blocks or stones in a ring on the base you have just created. Make sure to line the edge of the stones up with the edge of the gravel base. Using the mallet, tap the stones on the sides and the tops to make sure they fit snugly against one another and are level. For those using a fire ring or bowl, create a temporary second layer of stones and put the ring or bowl in to test that it fits. If it does not fit, you might need to widen your circle. After you have ensured the bowl or ring fits, or if you aren’t using one, you can start constructing the additional layers of the pit structure with the adhesive or mortar.
Remove the bowl or ring and test the second layer of stones or bricks. Apply beads of construction adhesive or lay down mortar on top of your first layer and then lay down the second layer of stones. Continue to use the mallet and level as you go along to ensure that everything is even and level. Do this until you have completed all of your layers (a typical fire pit is between 2 to 4 layers, depending on the type of stones or bricks used).
Step 4: Fill the Pit
Once you have finished constructing all the layers of the pit, fill it with more gravel or insert the bowl or ring. Do not fill the hole to the top if you are only using gravel or sand. Leave enough space to stack wood down into the pit to build your fire.
Test Your Fire Pit and Enjoy
Now that it’s assembled grab a few friends or your family and gather ’round. You can use portable folding chairs, or if you’re feeling extra ambitious, continue the project by building seating around the fire pit.
How Shur-way Building Centers Can Help
At Shur-way, we are proud to offer a wide variety of building materials for all of your outdoor and home project needs. From lumber and roofing materials to decorative stones and blocks, we’ve got it all! Call us today or stop by our Portland, OR, location to see how Shur-way Building Centers can help you get started on your next home project.